I am sooo sorry to those people who look at my blog! I think I might be finally up & rolling again...(fingers crossed!) I have had a whirlwind of things going WRONG!
First I couldn't get my videos uploaded on my computer....then after a week I finally got them uploading but then when I tried to put them on BLOGGER it FAILED!
I then realized all my hard work in doing all those videos & figuring out how to put them on here, was all done in vain! Blah! So I decided okay I have going to have to do everything AGAIN and take simple step by step pics! Welp, that was a disaster I went to go use my camera once again & it DIED on me! Now I know my camera was old but it didnt' have to go out and DIE on me! So for over a month I have been waiting to buy a NEW camera which I finally got! YAY! So....again bear with me! Thanks!
Monday, March 28, 2011

Monday, January 31, 2011
Simple Brooch
Technical Difficulties! I can't seem to get my videos to upload...please bare with me! Sorry!
Sunday, January 30, 2011
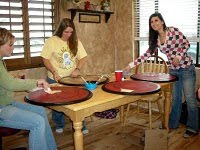
Fabric Frenzy!

The items which I will be posting about over the next week will include, BUT are not limited to, the pictures which you see above! I had a ginormous amount of fun & drove the hubs crazy & learned a lot! With that being said, there will be LOTS of pics coming along with instructions so stay tuned & I will do my BEST to do a post every day this coming week! So become a follower why don't ya!
Monday, January 24, 2011
DIY- Dried Apple Felt Wreath

So I came across this fun craft and have been wanting to do it FOREVER! I found it on http://www.designspongeonline.com/ It's such a FUN, EASY & CHEAP project! I call it "Dried Apple Wreath" because so many people have really thought it was until they looked at it closely, I modified it just a little bit from her instructions by inking the edges to give it that old look! It's totally up to you weather or not you ink you edges, I just needed something to go with the rest of my rustic look! You can click HERE for her instructions & the original un-inked look....I thought she really explained everything well & easy enough for me to follow!

( 10" Wreath, Felt, Pins, 3" Circle & Ink pad)
Items Needed:
- 10" Styrofoam wreath $1- You can get them from DOLLAR TREE (which is where I got mine!) If you wanted one bigger you can get them at any craft store, just remember your coupons!
- Pkg of Pins- I all ready had some but I am sure you can pick them up anywhere and you don't want them to be any longer than an inch or else it will go all the way through the Styrofoam!
- 1 YD of Felt $3- Since I only used a 10" wreath I only used about 1yd if you were going to do a bigger wreath like a 12" I would get maybe 1 1/4-1/2YD. I used a Cream color!
- 3" Circle Template FREE- I just traced the inside of a masking tape roll onto cardstock paper! (Unfortunately for my husband it was his Sportsman's 20% off coupon! Oops!)
- 6" Ribbon - Color of your choice- I used Brown
- Ink Pad- I used Brown (OPTIONAL)
TOTAL COST- About $5


(SHOPPING TIP- If you get the felt at Walmart it's only $3/YD! Unfortunately they did not have the color I was looking for so I ended up going to Joann's where it was $4.99/YD But I used a 50% off coupon of theirs so it was pretty cheap. Also if you need to buy a Styrofoam wreath there & felt, just print off a ROBERTS coupon and Joann's will honor both the Roberts coupon for the one item and then their in store coupon for your felt! It worked for me!)
Steps on How To:
Step 1- Make a 3" Template. Like I said before I traced the inside of a masking tape roll.
Step 2- Cut your 3" circles from your felt. I just pinned the template on the felt and cut around it, since my felt was folded, I was able to cut 2 at a time! I did not count how many circles I had cut, but I can tell you I had 4 stacks of the one in the picture shown above!
Step 3- I then took my felt stacks & inked the edges.
I used Brown ink- this is totally OPTIONAL!

Step 4- After all the felt is cut & inked you can then start! First fold your circle in half and then in half again! (sorry for my bad camera!)

Step 5- Now put one of your pins through the bottom of your folded up felt and stick it in your wreath form.

Repeat steps 4 & 5 with each circle until your wreath filled all the way around on the inside and out but you don't need to worry about the back!

Step 6- Once you are all done take your ribbon & fold it in half, and attach it to the back of the wreath with two pins, which is now your hanger.
You're Done!

(My husband actaully made me this the rustic window panal, for Christmas, which will actually be hanging up along the wall there in the Kitchen! I can't wait!)
If you would like to see more of what the wreath is supposed to look like through the process go Here! She has great pics which I frankly forgot to take any during the actuall process...haha....I am still learning here and next time I will take more pics! But thanks for looking and I hope you have fun doing this!
Subscribe to:
Posts (Atom)